Thursday, April 12, 2012

Project Run and Play Season 4 Sew Along - Week 1


Woohoo! Season 4 of Project Run and Play began this week! I am so excited to see what the contestants come up with. I just love this series and love that the readers get to sew along!
During season three, I participated in week one and week three and had so much fun. For week one this season, the challenge is a remix of Dana's Circle Skirt.. This is such a cute skirt with very easy to follow directions. I see a lot of circle skirts in Erin's future ;)
To remix this pattern, I decided to make the skirt with ties that came out from the center of the waistband so that you could tie a bow around the front or back of the skirt. I thought this would be a fun little option and a cute way to dress up a simple skirt.
I used some pretty Denyse Schmidt fabric that I purchased at my local Joann's. The floral fabric is Sugar Creek Floral Meadow and the polka dots are Fairground Dots blue/green.  I cut out the skirt according to Erin's measurements, the pieces for the ties (26" long by 4" wide) and a piece to create a casing for the elastic waist band (24" long by 4" wide). For the ties, I wanted to add a little interest to the ends so I drew a diagonal line from the top of the folded in half tie to the bottom and sewed a stitch down the line to create a point. Then I clipped the extra fabric and turned the ties out.


I took the raw edges of the ties, folded them down a 1/4 inch then another 1/4 inch and sandwiched them in between the elastic before sewing the elastic together.

I then followed the rest of Dana's instructions to attach the skirt to the elastic waist band. Instead of hemming the skirt, I encased the raw edge in some lime green bias tape.


I think the skirt came out pretty cute! And Erin just loves it!! That's what counts the most =)


Perfect skirt for twirling around

and around
and around

and around!

Tada!!

Tuesday, April 10, 2012

All dressed in their Easter best


This year for Easter I decided to make Erin's dress and also make a matching tie for Jack. I had high hopes of making a dress for myself as well but since I was sewing Jack's tie at 11 o'clock the night before Easter that just didn't happen. I will make the dress for myself one day...hopefully ;)

Little cuties!

Up close of the skirt panels and hem

back of dress
I used the bodice pattern I created for the 60's inspired drop waist jumper - just shortened it a bit. I wish I had tapered it as well because the waist of the dress turned out to be a little big on Erin but the sash helped to cover up the fact - yay! The skirt is made up of twelve panels of three different coordinating fabrics that I purchased at Joann's. It is such a pretty line called Flutter Butterfly. I bought two yards each of the main butterfly pattern, the scrolls and the stripes back in February and had no idea what I was going to use it for! I knew it would be something for Erin because she loves purple so I am really glad I had it when I decided to make her dress.

For Jack, I wanted him to coordinate with Erin so I made him a tie using the stripe fabric and the Little Guy Tie pattern from Make It and Love It. The tie was very easy to make and came out so cute! I will definitely make Jack some more ties using this pattern in the future!

Little man and his tie :)
We had a really lovely day with our family. My brother hosted Easter dinner and made a delicious leg of lamb. He even hid eggs for the kids to find around his living room - he is such a great uncle!!
Hope everyone had a wonderful Easter as well!

Saturday, March 3, 2012

"There is no one alive who is Youer than You.”

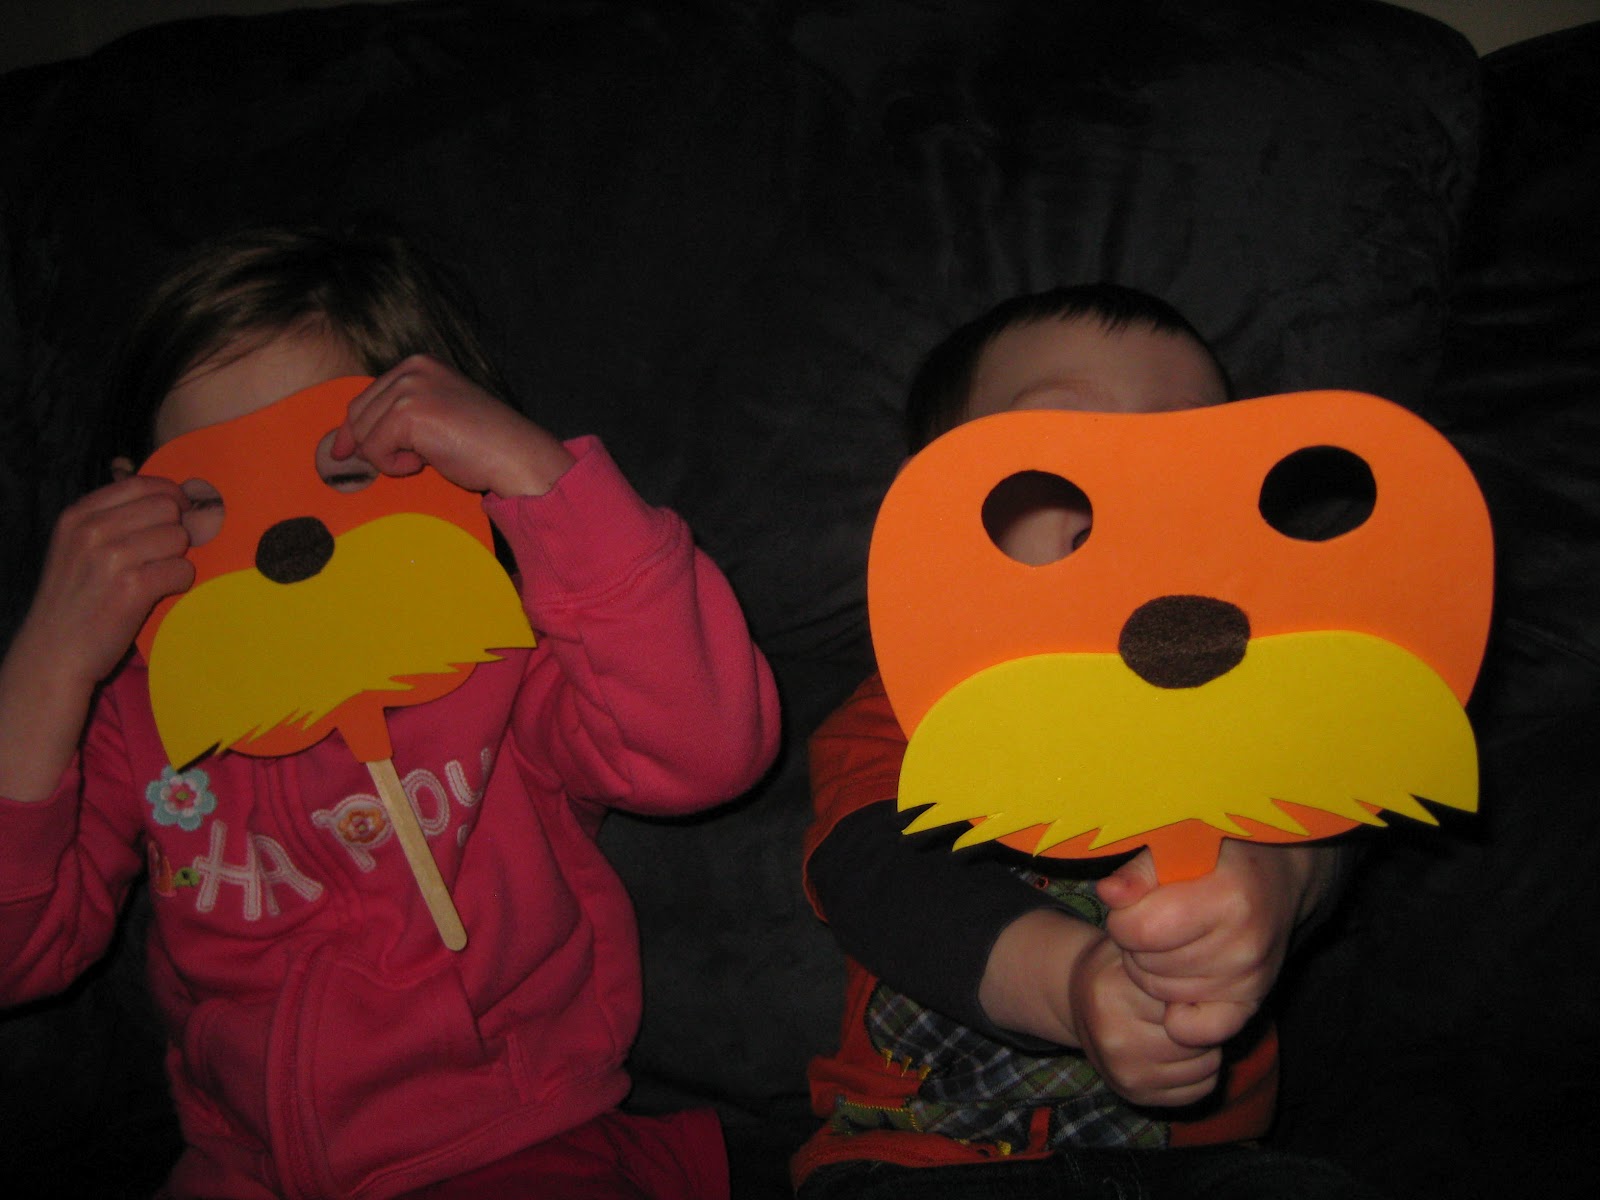
Yesterday, in honor of Dr. Seuss's birthday, the kids and I celebrated with a couple of cute activities. I found a great idea on Pinterest for making Cat in the Hat hat cookies but I used red cookie icing instead of the red candy melts for the stripes. I then searched around for some Lorax themed crafts. I found this tutorial for making a Lorax mask and changed it up a bit based on the materials I had on hand. After making the cookies and the masks, I read the kids The Lorax and they goofed around with their masks.


For the masks, I used some foam pumpkins I had on hand. Drew eyes to cut out on the orange pumpkins and used the yellow to make the moustache

I cut ovals out of brown felt for the nose and glued a Popsicle stick to the back

"I am the Lorax"

"I speak for the trees"


“Look at me!

Look at me!

Look at me NOW!

It is fun to have fun

But you have to know how.”

― Dr. Seuss, The Cat in the Hat

Cat in the Hat hat cookies
Happy Birthday Dr. Seuss!

Wednesday, February 29, 2012

Kitchen Organization

So for a few months now I have been  pleading, begging, demanding asking Kevin very nicely to build a shelf for the kitchen. I didn't want anything fancy, just something to help de-clutter the counter and free my canisters from the piles of stuff that accumulates on top of them.  It was becoming very frustrating not being able to just pull out a canister of flour or sugar when I needed it. Instead I had to move mail, sunglasses, keys, wallets etc out of the way first. We basically put anything that we didn't want the kids to touch on top of the canisters and other random things would wind up on the counter around them. This is a picture of what the counter looked like:
Such a mess - this is seriously what it looked like on a daily basis - embarassing!

And this is what the counter looks like now!

Ahhh organization and easy access to my canisters!

Here is my wonderful husband installing the new shelf

look at all that free counter space

Kevin and I each have our own cubbies and there is one for the mail - just what we needed!

Mine is the one on the left, mail in the middle and Kevin gets the right (notice the "Backyard Sugarin'" book in Kevin's cubby? That is another post coming soon :))


It is so nice having my counter back again! Maybe I'll be able to get Kevin to guest blog one day on how he made the shelf. We'll see ;)

Friday, February 17, 2012

Crayon Art Portfolio - pattern by Gingercake

I am very excited to add a new item to my little shop - the Crayon Art Portfolio! I purchased this pattern from Gingercake (who has such amazing patterns and very easy to read instructions) to make gifts for the kids. I had quite a few people ask if this was an item I was going to have for sale, so I contacted Virginia of Gingercake to see if I could be listed as a seller and she said yes! Yay!
The Crayon Art Portfolio is great for keeping your kids busy when on the go. The interior has three pockets all together - one pocket that holds 12 crayons, one for sticker sheets and one for a 5x8 pad of paper or mini coloring book. It has a Velcro closure and handles for little hands to tote their portfolio around.
There are so many other wonderful patterns in the Gingercake shop and her blog is really great too. I hope you all head over and check out her stuff and perhaps pick up a pattern or two! And for those of you who just prefer to purchase a finished product than make it yourself, check out my Facebook fan page for some cute Crayon Art Portfolios for the little kiddies in your life!


Inside of portfolio - 2 pockets on the left, one for stickers and one for 5x8 pad of paper or small coloring book. Pocket on right holds 12 crayons

 crayon pocket

sticker and paper pockets

handles for little hands to carry


Tuesday, February 14, 2012

Happy Valentine's Day, cupcake!

Happy Valentine's Day everyone! I thought I would share the cute cupcake cookies that I made for Erin to give to her classmates for a special Valentine's Day treat.
The idea for these cookies came from the cute cupcake cards I found at Target a few weeks ago. I used a butter cookie recipe this time instead of the sugar cookie recipe from last month and I like this one much better. I added a lollipop stick to the back of the cookies before baking them. This was really simple to do - just place the lollipop stick on the back of the raw cookie and press down slightly. Then put a bit of cookie dough over the stick, turn the cookie over and press down slightly again. The cookie bakes up flat and now you have a cute cookie pop! For the icing I used homemade buttercream and tinted it the shade of blue and purple that I wanted. For the bottom part of the cupcake (the wrapper) I used Betty Crocker Chocolate cookie icing. I piped the chocolate icing on first and let it dry for about an hour and then I piped on the buttercream icing. Each cupcake was topped with an M&M "cherry". I let the buttercream dry over night before packing the cookies up in clear treat bags.


I think that they came out pretty cute and Erin's classmates seemed to really like them!
Hope you are all having a happy love filled day. And to share the cookie love I am posting the butter cookie recipe and buttercream recipe below xoxo


Butter Cookies

2 cups all-purpose flour
1/2 teaspoon baking powder
1/4 teaspoon salt
10 tablespoons unsalted butter at room temperature
3/4 cups plus 2 tablespoons granulated sugar
1 large egg
1 1/2 teaspoons vanilla extract

- In a medium bowl, whisk together the flour, baking powder and salt
- In a large bowl, beat the butter and the granulated sugar with an electric mixer at medium-high speed until light and fluffy
- Beat in the egg, then the vanilla
- On low speed, gradually add in the flour mixture, stirring until just incorporated
- Divide the dough into 4 pieces, shape each piece into a disk, wrap in plastic and refrigerate for about one hour (dough can be made up to two days ahead)
- Preheat oven to 350 degrees
- On a slightly floured surface roll out the dough, one piece at a time, to 1/8 inch thickness
- Cut out shapes using assorted 2 to 2 1/2 inch cookie cutters
- Place cookies 1 inch apart on a parchment lined cookie sheet
- Bake the cookies for 8 to 10 minutes, until edges are lightly browned
- Cool for 1 to 2 minutes on cookie sheet before transferring to a wire rack
- Cool completely before icing

notes: scraps of dough may be chilled and re-rolled once
I rolled out my dough to 1/4 inch thickness and baked the cookies for 12 minutes instead


Buttercream Icing

2 sticks unsalted butter
3 3/4 cups powdered sugar
1 teaspoon vanilla extract
1-3 tablespoons milk

- Cream together the butter and vanilla
- Slowly add the powdered sugar
- Add in the milk (number of tablespoons of milk depends on consistency you are looking for)
- Tint any color you like or leave plain
- Makes enough to ice two 8 inch round cakes or 24 cupcakes

Saturday, February 4, 2012

Girl on the go!

This was a busy week over at Once Upon A Notion. So busy that I was not able to finish my special occasion dress for the week 5 Project Run and Play sew a long - oh well hopefully they have the sew along again next season. Anyway, on to the busy week. I attended a launch party for a fabulous new website http://www.thelittlebloom.com/. To quote the About section of the site "The Little Bloom.com (TLB) is a local “one-stop-shop-type” hub designed to simplify mommyhood for Hudson Valley Moms wanting to stay in-the-know." This website is full of awesome resources for moms such as tips for getting your toddler to sleep, winter craft ideas, coupons for local shops and vendors, an events calendar and lots of cool programs like Meals and More and Mom Swap. It really is an amazing site and I am so happy to be a part of it!
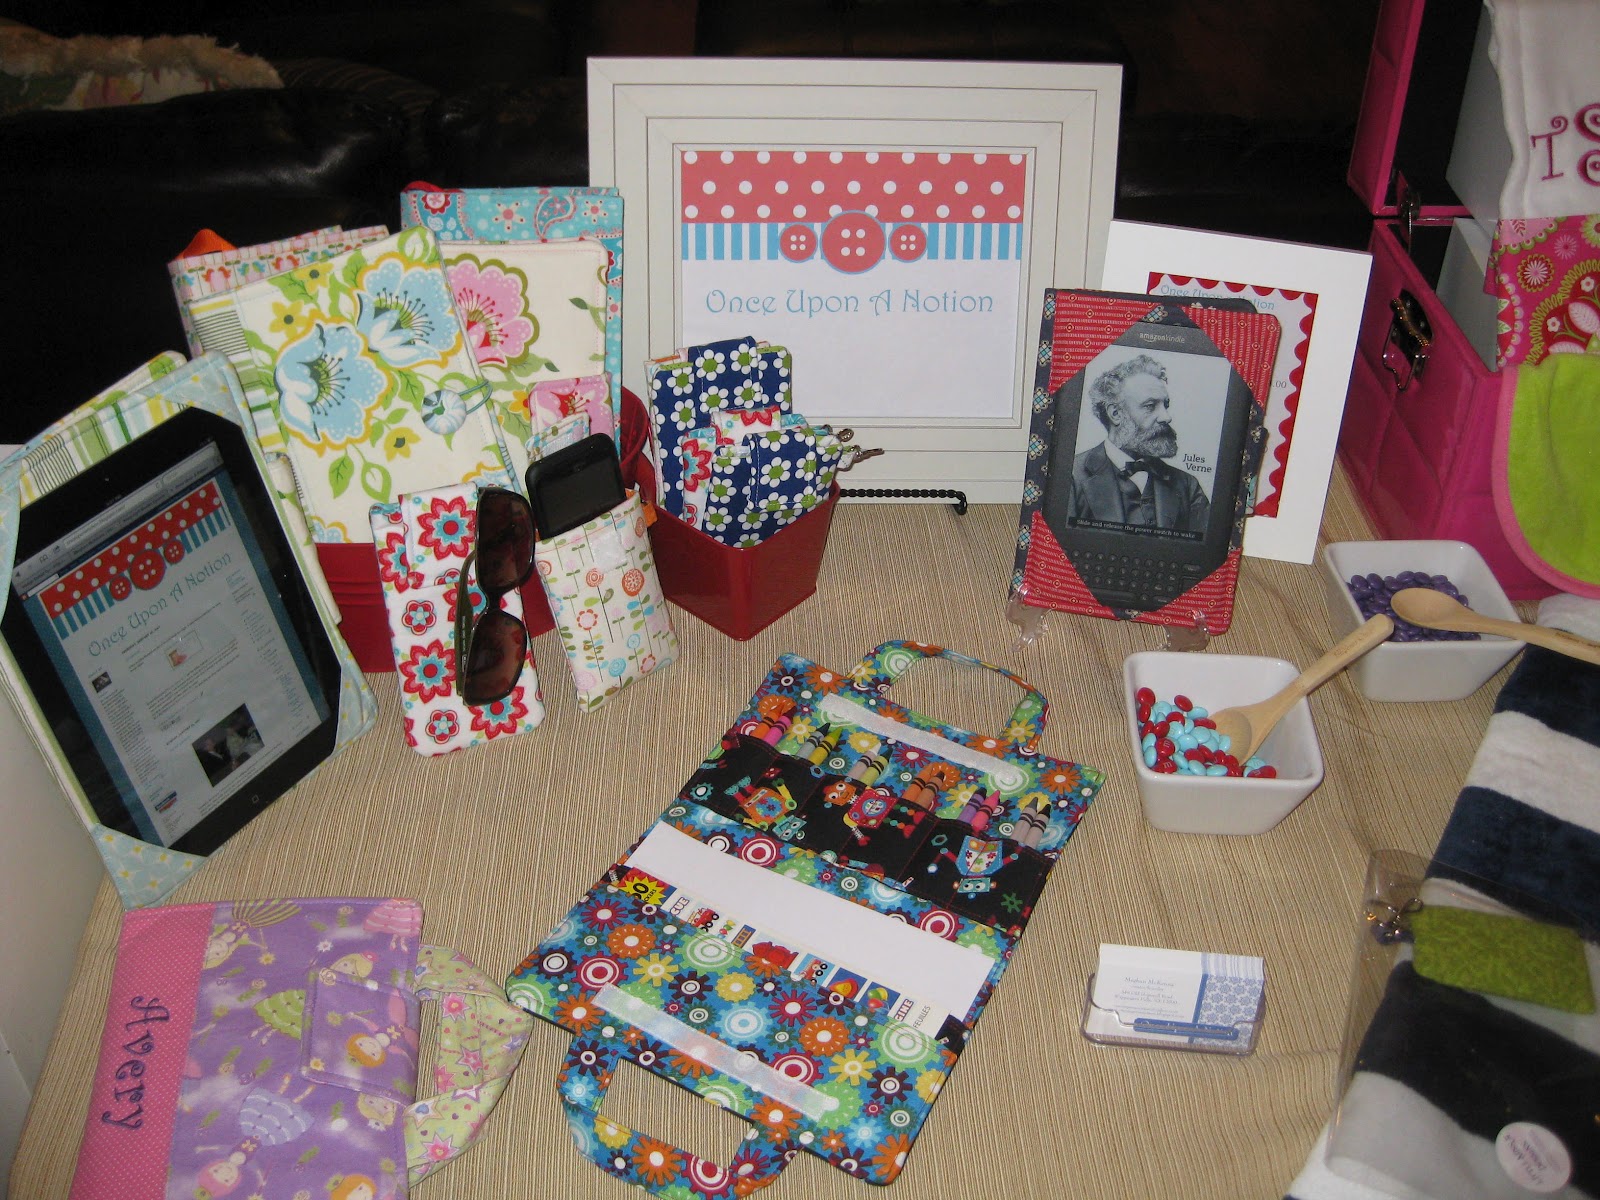
The launch party for The Little Bloom was on Wednesday night. My good friend Angela from Little Miss A Designs and I shared a table. We met a lot of great people and had so much fun showcasing our items! It was an amazing night full of amazing food, people and vendors! You can check out pictures from that night over at The Little Bloom's facebook page. Here are a couple of pictures of the table I shared with Angela:


Our table =)

Once Upon A Notion

Little Miss A Designs
For the night of the launch party, each vendor was asked if they would like to offer some sort of give-a-way item. I said I would definitely have an item - what a great way to promote Once Upon A Notion! I was thinking of using my iPad case as a give-a-way but not everyone has an iPad or an e-reader for that matter so that was out as well.  I wanted the item to be something that anyone could use.  Then I thought about how many times I am out and about and wish I had something  in my purse to hold all my coupons, appointment cards, notes, a pen - I am constantly rummaging through my purse looking for all the items I just listed (which can be frustrating - especially to the people behind me on line at any given store when I can't find the coupon I know I JUST had). That is how the Girl on the Go! Organizer came about. This item has pockets like the iPad cover but instead of holding an iPad it holds a 5x8 pad of paper. Perfect for writing up shopping lists and storing the coupons you need, writing down appointments and reminders and just keeping yourself organized while on the go!
Here are some pics of the Girl on the Go! Organizer that I created for The Little Bloom Launch Party give-a-way:
Girl on the Go! Organizer

Inside: multiple pockets on the left hold a pen, business size cards, coupons, notes etc. pocket on the right holds 5x8 notepad and is reinforced with interfacing for extra durability


Button and elastic closure - so you can stuff lots of things in there and still close it!


So it was a busy week here creating some new items and helping to launch an awesome new site! Hope everyone has a great weekend =)